Find the 2D / 3D switch
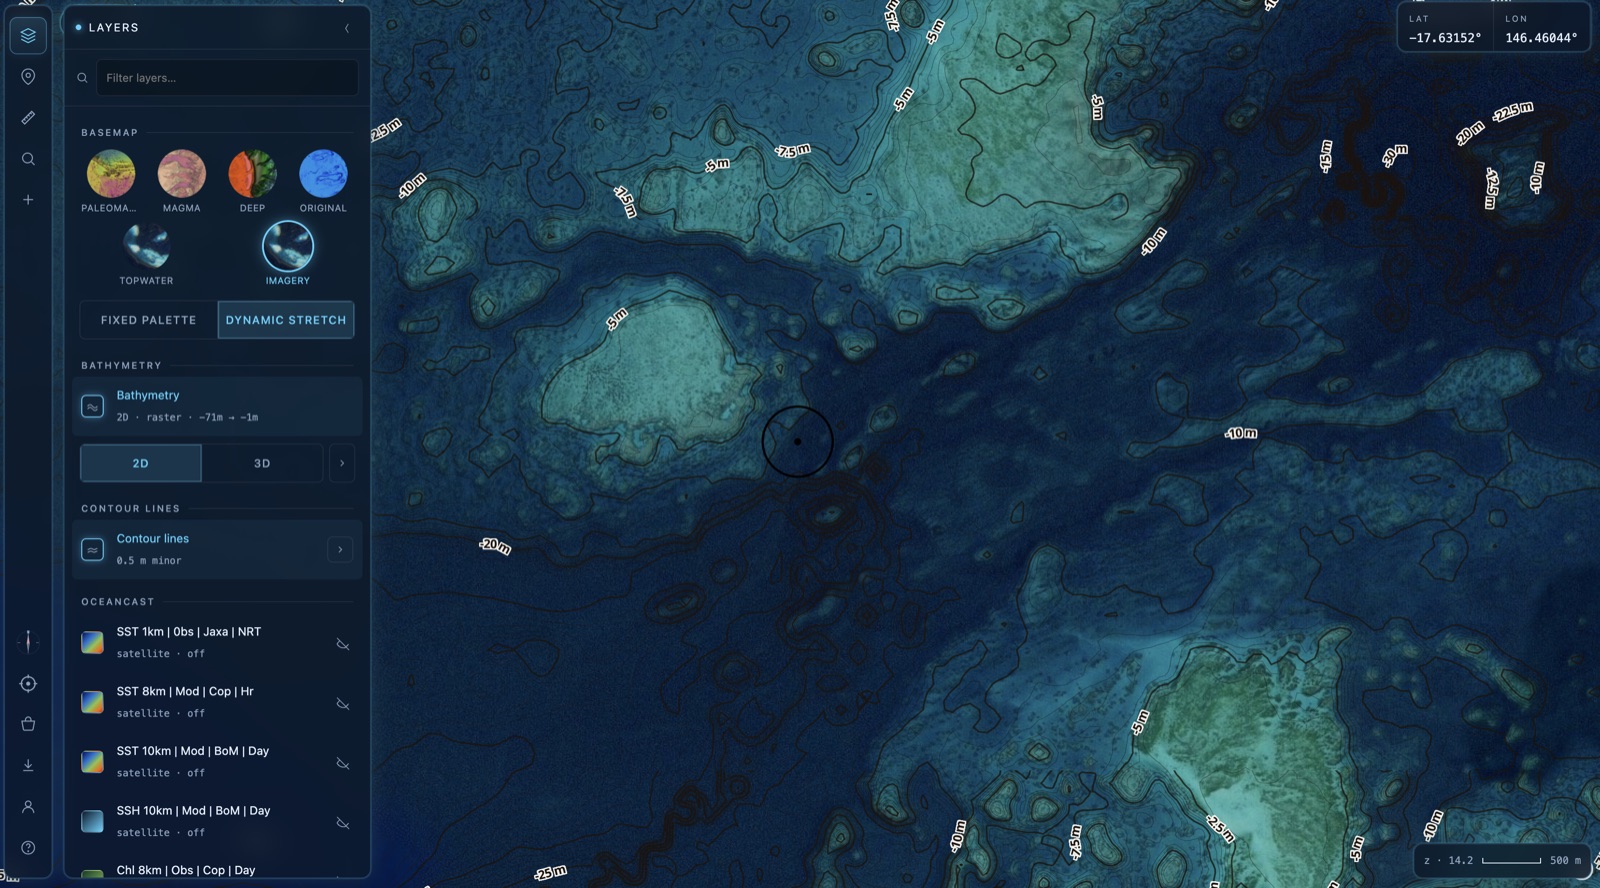
Open the Layers panel from the stacked-layers icon in the top-left toolbar. Scroll to the BATHYMETRY section — this is the heart of the map.
The Bathymetry card shows the current mode and depth range (e.g. 2D · raster · −71m → −1m). Directly beneath it sits the 2D / 3D toggle. That single switch is all you need.
Switch into 3D
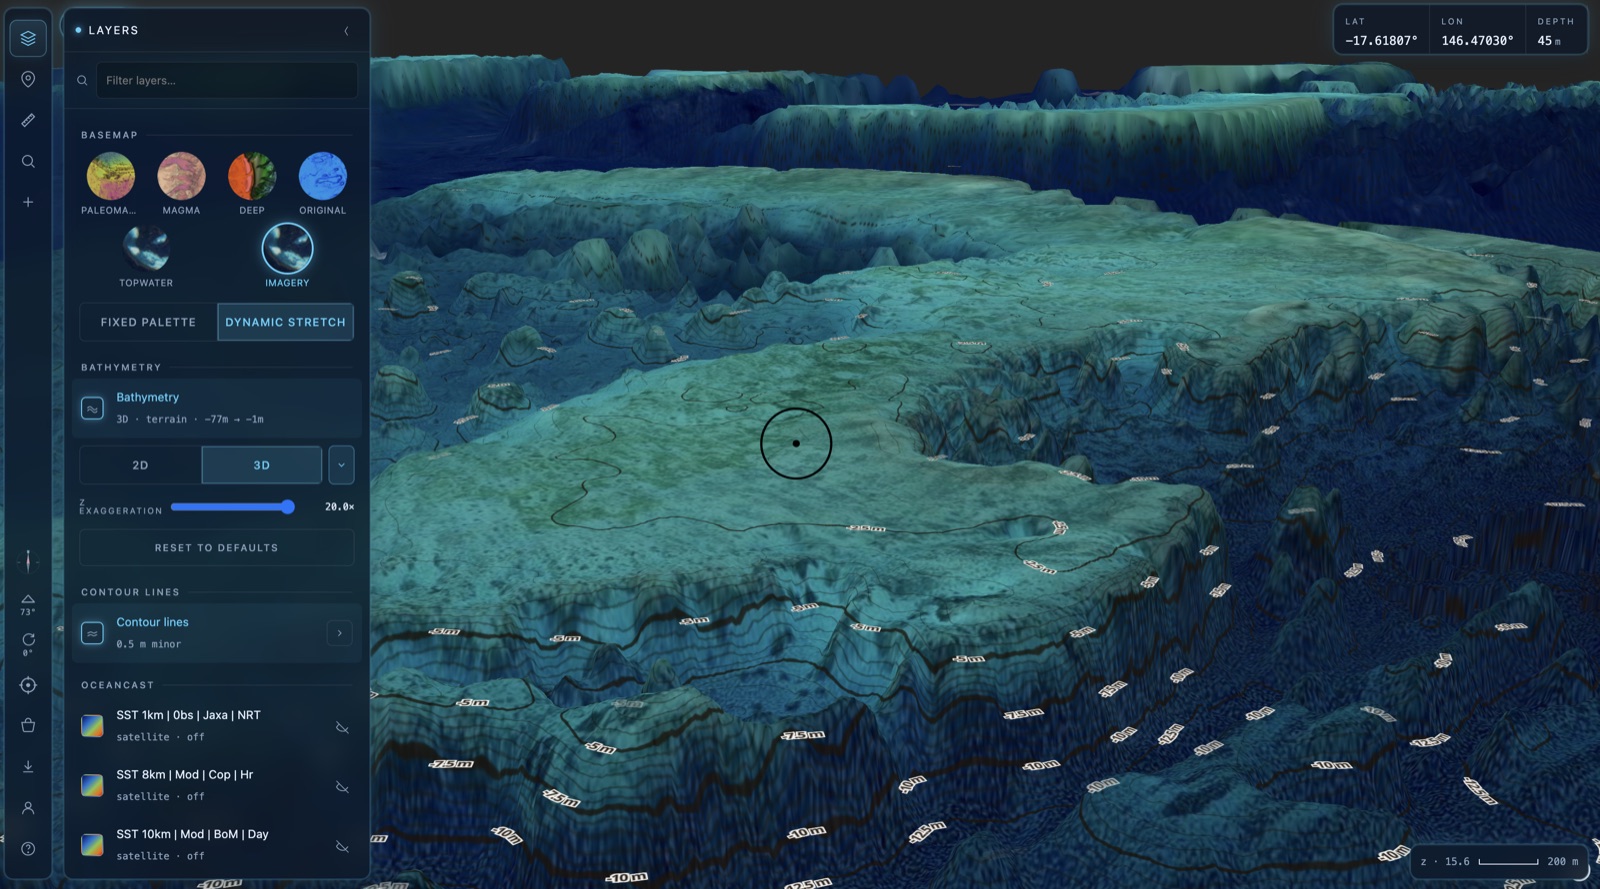
Tap 3D on the toggle. The map tilts and the seabed rises into a living terrain — every ledge, pinnacle, lump and bump comes to life. The card updates to 3D · terrain to confirm you're in 3D.
Want the flat top-down chart back? Just tap 2D again. You can flick between the two as often as you like — your position and zoom are kept.
Dial in the Z exaggeration
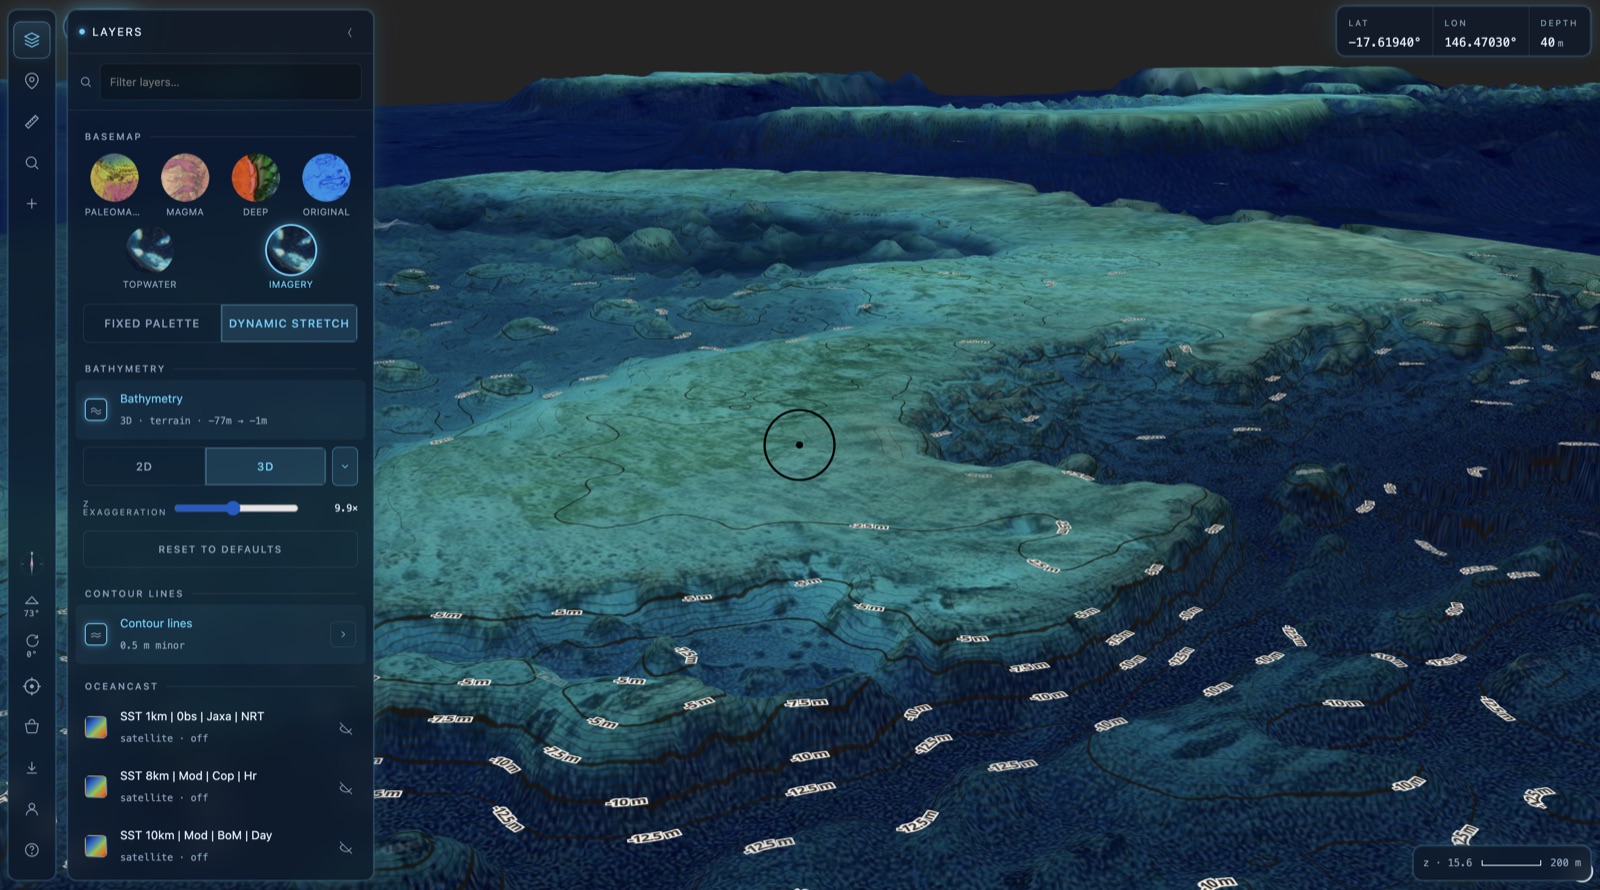
In 3D you'll see a Z EXAGGERATION slider. This stretches the vertical scale so subtle structure stands out — gentle slopes and small humps that are easy to miss on a flat chart suddenly pop.
Drag it left for a natural, true-to-life relief. Drag it right (up to 20×) to dramatise the terrain and spot the fishy bits fast. Hit RESET TO DEFAULTS any time to return to a sensible starting point.
Move around in 3D
3D adds two new ways to look at the seabed on top of the usual pan and zoom:
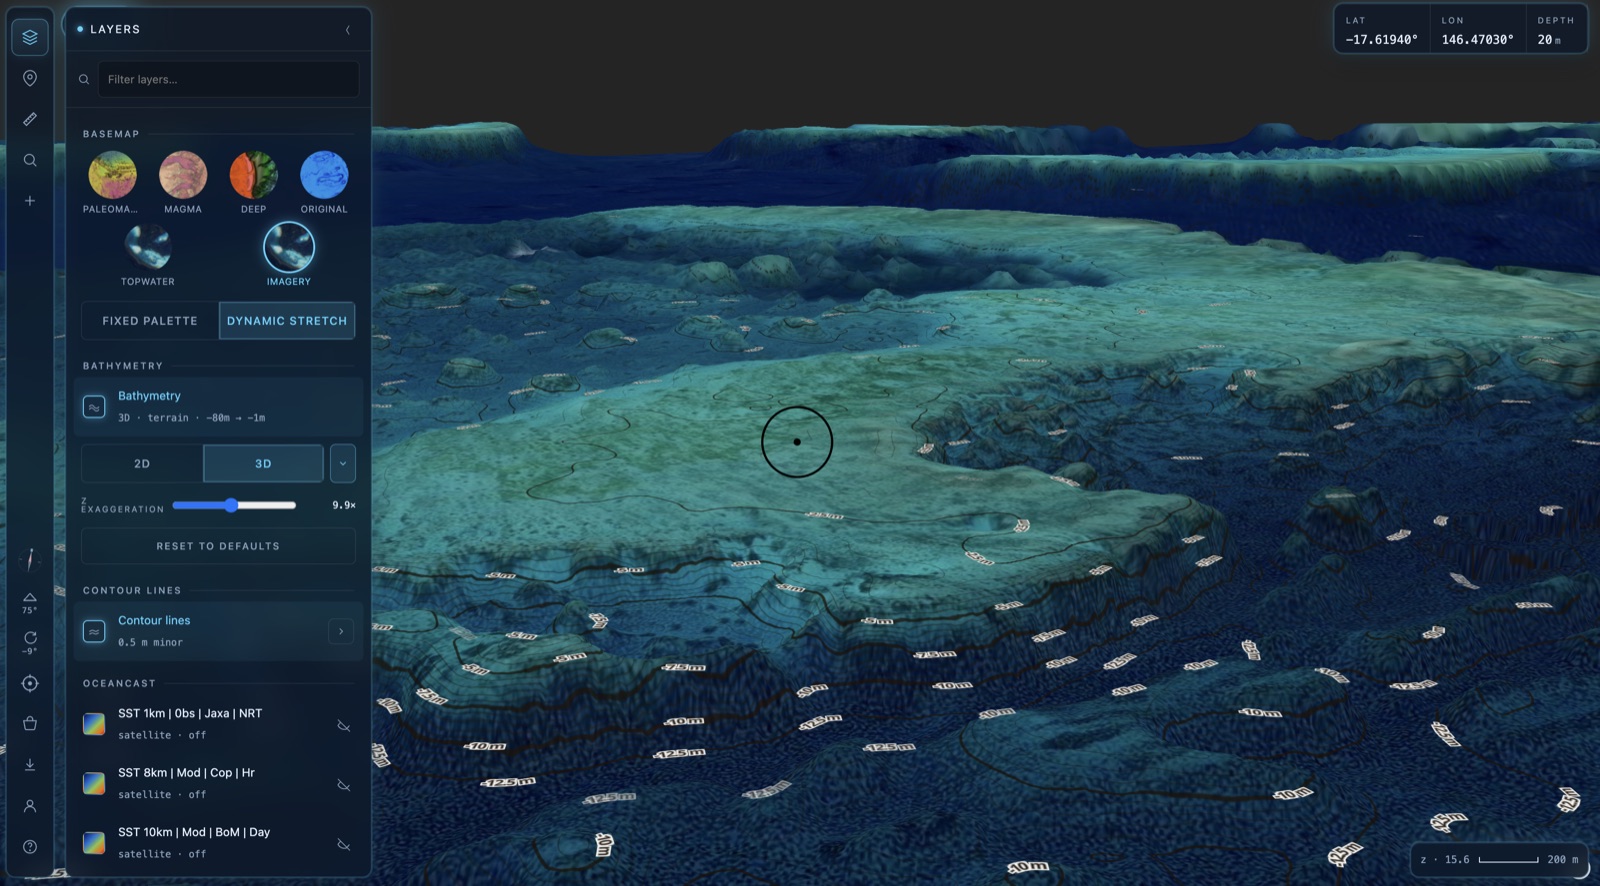
Tilt changes how steeply you're looking down — from a near top-down angle to a low, dramatic view across the terrain. Rotate spins the compass so you can come at a feature from any direction and see how it sits relative to the drop-off.
On a trackpad: two-finger drag to tilt & rotate. On a mouse: right-click and drag. On touch: drag with two fingers. Scroll or pinch to zoom as normal.

Know when to drop back to 2D
3D is gorgeous, but it asks more of your device and connection. If things feel sluggish, switching to 2D is the quickest fix — and you lose none of the detail, just the tilt.
🛟 Switch to 2D when…
- Your internet is patchy — out on the water or on poor signal, 2D loads far lighter and keeps the map responsive.
- You're using OceanCast layers — SST, currents and other oceanography data sit best on the flat 2D chart, and combining them with 3D terrain is the heaviest thing you can ask the map to do.
- The map is slow or your browser is struggling — if rendering stutters or the tab feels heavy, drop to 2D to lighten the load instantly.
Think of it this way: 3D to explore and understand the structure, 2D to fish it and layer on your data.
That's 3D in a nutshell. 🎣
Jump back in, flick on 3D and have a play with your favourite marks.
Open BathyMaps →